
My favorite part of our wedding projects so far, the invitations, started as a generic idea and evolved into a fun product of our teamwork. We knew from the beginning we would go through Paper Source, because their colors actually helped us determine our wedding colors. We made a total of 115 invitations, all 100% in our own home. So, here goes:
Materials to make one invitation
For the invitation card
- A7 Flat card (moss) - this was our backing
- Half-Moon/Pocket Enclosure flat card (luxe cream) - this was the actual card we printed on
For the information card
- 8 1/2" x 11" text paper (beet) - this was our backing
- A6 Flat card (luxe cream)
For the reply card & reply envelope
- A7 Flat card (luxe cream) - cut in half
- 4 Bar envelope (moss)
For the outer envelope and lining
- A7 envelope (moss)
- 8 1/2" x 11" text paper (beet)
- Envelope liner templates from Paper Source
Other Materials
- printer and ink
- paper cutter (thanks, Heidi and Ed!)
- ink pad from Paper Source (boysenberry)
- grape rubber stamp from Paper Source
- double-sided tape (I preferred Scotch Scrapbooking Tape, but suddenly none of the Targets I went to carried it anymore, so the other stuff worked fine)
- scissors
- a ruler
- Adobe Illustrator or other design software
Process
Terry designed all of the materials on his own using Adobe Illustrator. We used traditional invitation wording and kept the invite card simple. Most pieces of our stationary had our "signature" bunch of grapes, sometimes with a vine attached. Again, Terry designed all that. To keep the colors consistent, we printed out several color samples and compared them to the green and/or purple paper. The printing was a chore at first, but Terry finally got the paper running through the printer smoothly.

All the pieces of our invitations.
For the reply cards, we chose to keep everything super simple with a clean border and the basics. Since we're doing family style, we didn't even need to include meal requests. The reply envelope was stamped with a custom rubber stamp (to save my hand) with my parents' address and a "love" stamp. We also included our grape stamp on the back flap of the envelope.
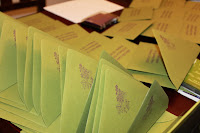
Reply card envelopes - address stamp and grape stamp.
For assembly, I first had to cut each of our printed pieces down to size. The half-moon/pocket enclosure flat cards needed 1/4" cut off in order to fit evenly on the backing (the A7 cards). For the info cards, I had to cut the A6 cards down to almost a square, and I had to trim the 8 1/2" x 11" text paper down to 1/4" larger than the newly-sized info cards. I only needed to cut the reply cards in half.

The trimming process.
Once trimming was finished, I got a little crazy with measuring each piece of double-sided tape so that it fit almost exactly along the edges of the flat cards that we were mounting. I used a ruler and scissors to cut the tape, but a less crazy person may have just estimated. Once I got the hang of it, though, I think the ruler helped save me time, because then I never had to go back to fix any mistakes. Actually placing the cards on their respective backings proved tricky; it was nearly impossible to ensure that each one would be exactly centered, but I did my best! One friend mentioned that hers was crooked, but then she knew we made them ourselves - so I guess that's something!

The finished invite!
The envelope lining was time-consuming but totally worth it. I can't tell you how many compliments we've gotten on the lining of the envelope - of all things! Paper Source made it super easy - I just used their envelope liner template kit to trace each liner, then cut the paper, stuck it in the envelope, and taped it down using my new favorite tool - double-sided tape. Again, I probably made the process lengthier than necessary by first using a ruler to crease the paper and then taping it down to attach the envelope. We also stamped a grape stamp to the back flap of the envelope to tie in more of our grape theme. The outer envelope also includes our return address labels - custom ordered from Vista Print - and our wedding cake stamps from the good ol' USPS.
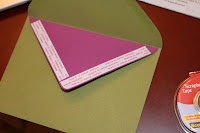
The outer envelope and lining.

The envelopes - all ready to go!
Assembly was easy after all that - invitation card in the back, then the info card, then the reply card (tucked in the reply envelope). We made sure to number each reply card - we've heard stories of people forgetting to write their names on the response cards. Then I addressed each envelope by hand - another time-consuming but worth-it process. Finally, we sealed everything up and sent 'em off! The whole process was a blast, in spite of the 50+ hours it took to get it all done.
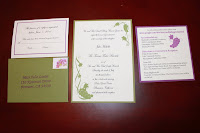
The complete contents - success!

